
Number assignment happens under User Management & Automation. From here you can give a user a number without opening the Microsoft Teams admin center and without PowerShell.
Finding the user
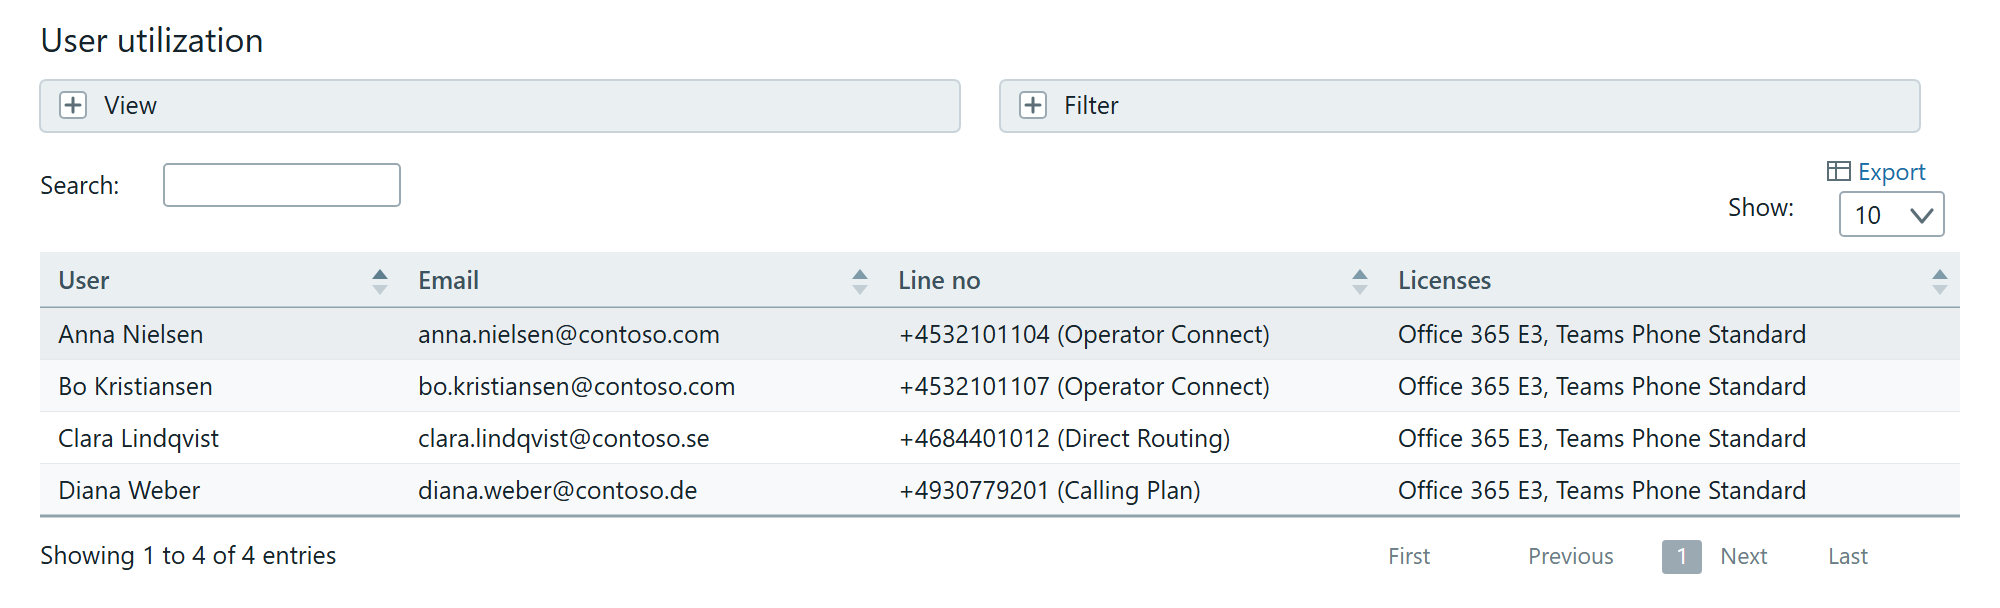
The User utilization table lists every user in the tenant. By default it shows the columns User, Email, Line no and Licenses.
If there are many users, there are three routes to the right one:
- The search field searches everything in the table — name, email address, number and licence
- View (+) unfolds a column chooser where you can switch on more columns: Voice routing policy, Calling policy, Dial plan and Usage location
- Filter (+) lets you filter by licence or by a specific policy
The configuration panel
Click the user's row. The User configuration panel slides in from the right.
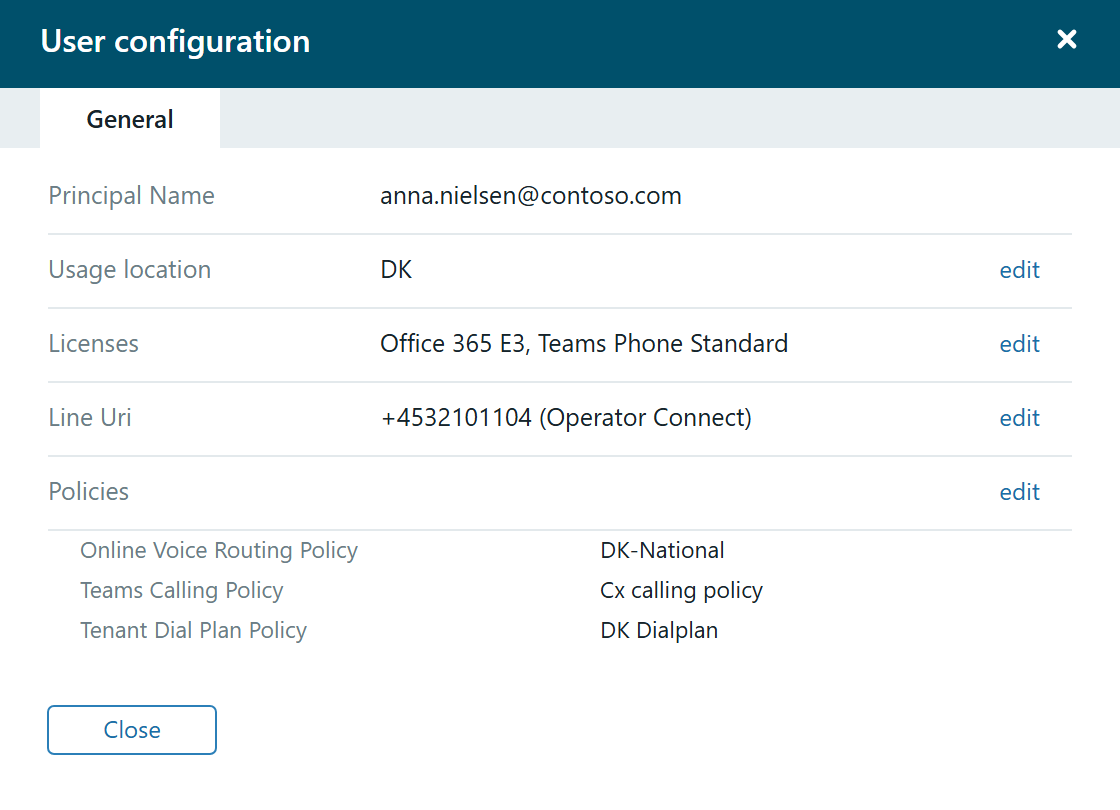
- Principal Name — What it is: The user's sign-in. Cannot be changed from here
- Usage location — What it is: The country the user belongs to. Governs which licences can be assigned
- Licenses — What it is: The licences the user holds
- Line Uri — What it is: The phone number, with the connectivity type in brackets
- Policies — What it is: Voice routing, calling policy and dial plan
How to assign the number
- Click
editnext toLine Uri. A small view unfolds with a Serie dropdown - Choose the number range. Each line shows the range's name, the interval and the number of available numbers in brackets — for example
DK Operator Connect +4532101100 - +4532101199 (24) - Click
Done
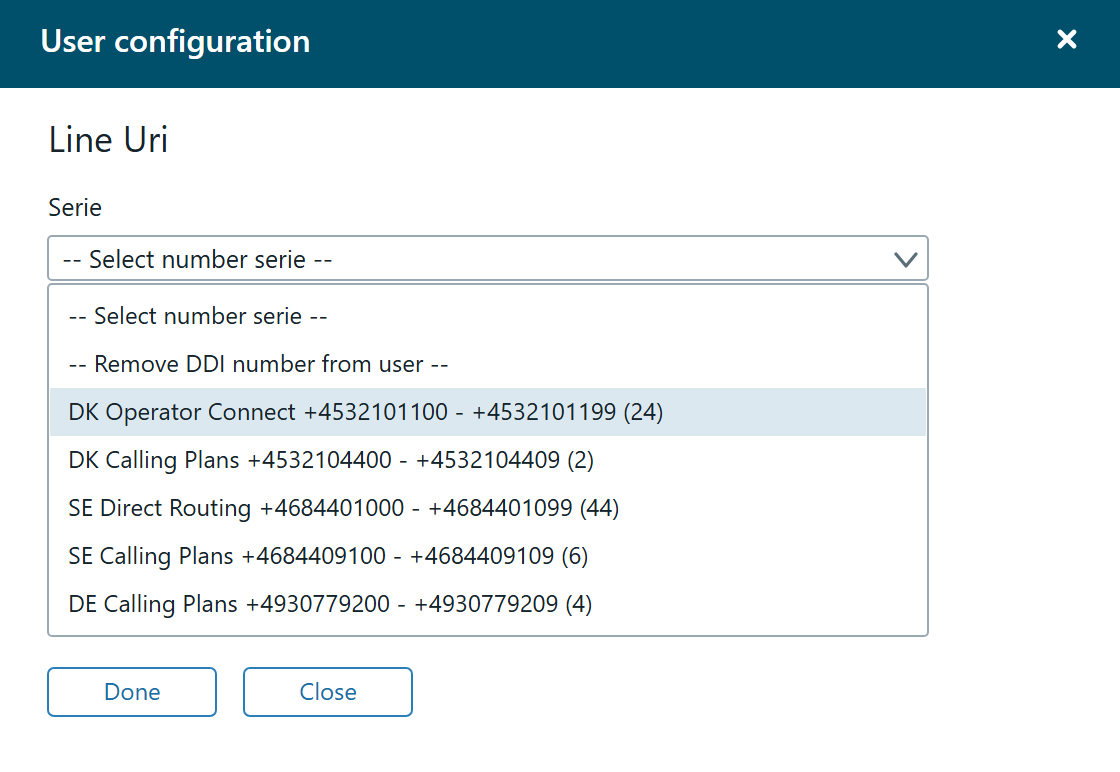
Only ranges with available numbers are shown. If a range is fully assigned, it does not appear on the list at all. If a range you expected is missing, it is either full or it does not match the user's setup.
The connectivity type matters. A user set up for Direct Routing will not necessarily be offered ranges on Microsoft Calling Plans. If in doubt, check the user's licences first.
How to release the number again
When someone leaves, the number has to be released so it can be used again.
Open the same view — edit next to Line Uri — and choose -- Remove DDI number from user -- at the top of the dropdown. Click Done.
The number is then available in the range again and shows up in the count of available numbers.
Consider quarantine. A number that has just been in use often keeps ringing for a while. If you hand it straight to someone else, they inherit calls that were never meant for them. Label the number instead to say it must not be assigned yet — see Labels in DDI Manager.
What happens next
The number now appears in the Line no column on the user's row, and it counts as In use in the range it came from. It also shows up in E.164 assignments under DDI Ranges, where you can see it side by side with the labels it carries.