
A label without numbers does nothing. The next step is to point it at the numbers it applies to.
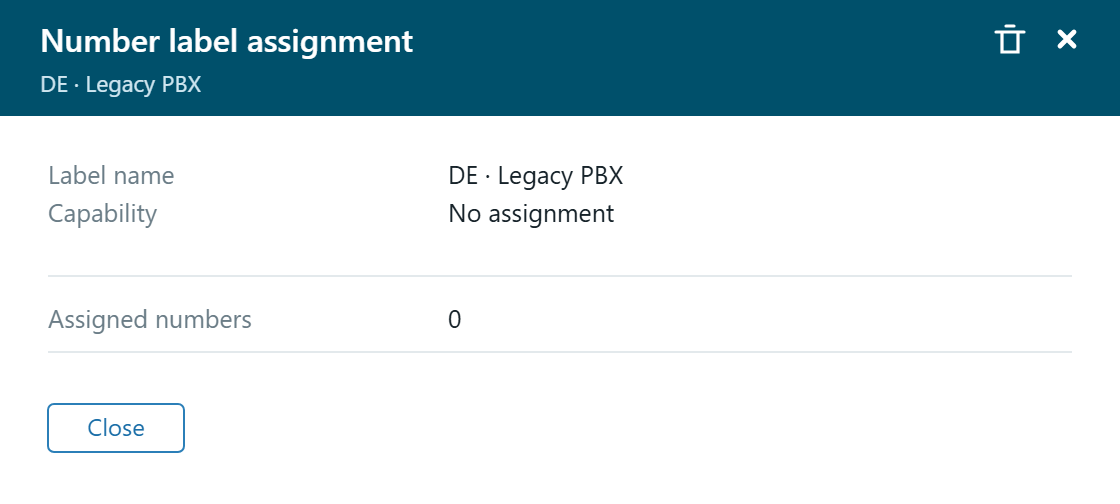
- Click the label in the table. The detail panel opens on the right.
- Click the
Assigned numbersline. The number picker unfolds. If you click theCapabilityline instead, you open name editing. - Narrow down to the right number range under
Configurations. Here you see all your ranges with interval and count — including those from other countries and other carriers. Tick a range to see only the numbers from it. - Tick each number. A green tick means selected. Use
Select allfor the whole range, or the search field to find specific numbers. - Click
Update. Nothing is saved until you press Update. The text "Press update to save changes" is there to remind you.
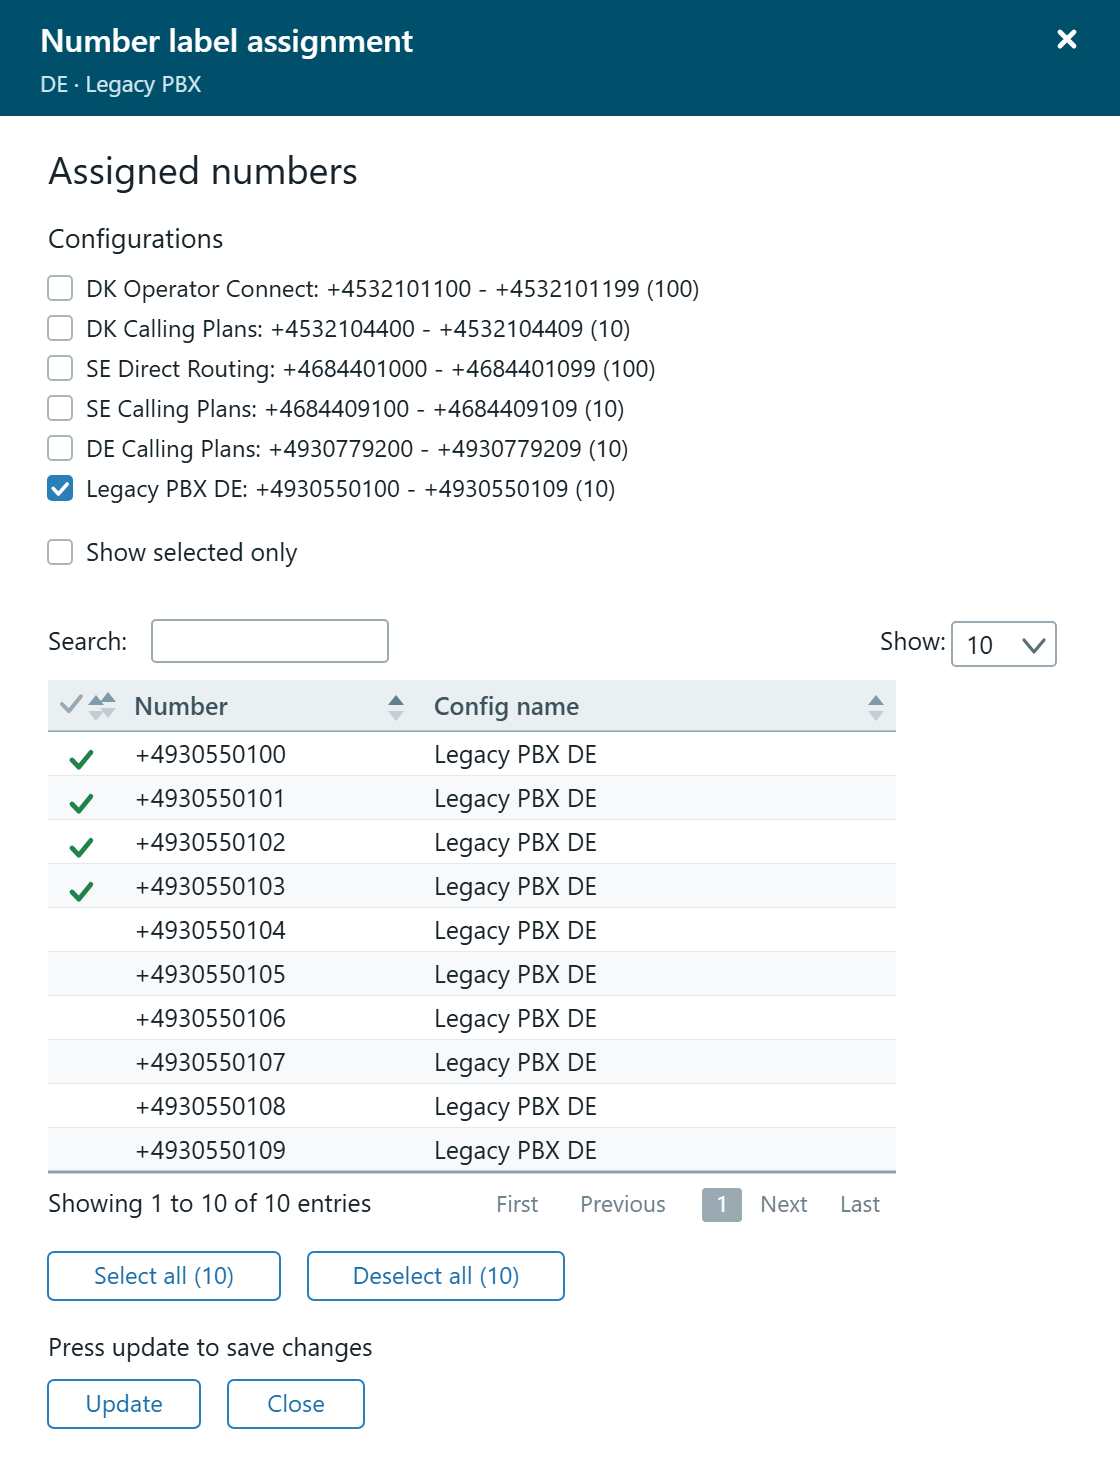
A shortcut for whole ranges. If an entire number range should carry the same label — for example a legacy range that has not been migrated yet — filter on the range under Configurations and use Select all. That saves you clicking through 100 numbers one at a time.
How to edit a label afterwards
Open the label and click the Capability line. The name field becomes editable, and an Update button appears as soon as you change something. The capabilities are still shown as fields, but they are locked — you can see them, not change them.
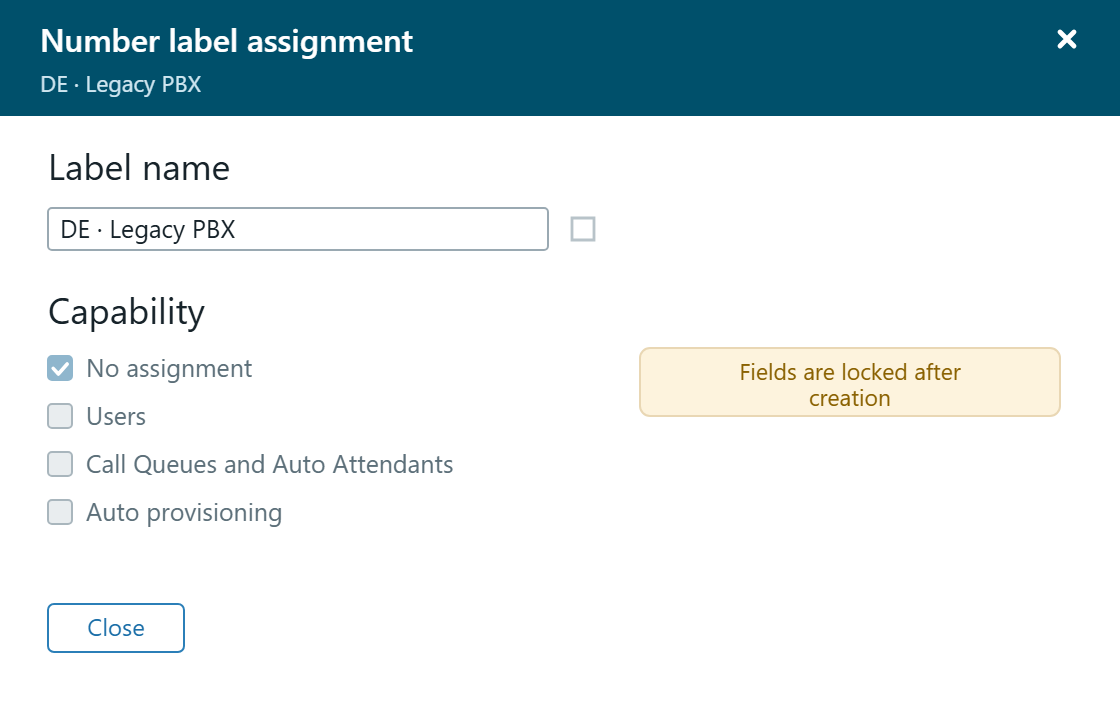
If the capabilities need to change, you create a new label and move the numbers across.